Siding acts as a protective material for the exterior of your wall. It is termed as the first line of defense against the weather condition for ensuring a stable and comfortable environment inside your house. There are different types of siding materials that people use for their houses. If you are in search of the best material to enhance the look of your house, then wood siding is the best option. This will definitely increase the value of your house due to its low thermal conductivity and elegant profile.
You must note that just like other organic products, wood also decomposes. But if the exterior paint is in good condition, then wood siding can last longer. Remember that the hairline crack can open a way for water to enter and this will lead to rot and mold growth. There is no doubt that wood siding is very strong but a sufficient physical impact can crack it or split it. So, if you are having a wood siding, then repairing is essential.
How do you repair wood siding on a house?
This is will be a question in your mind. We will be telling you all the things needed along with the steps involved in the process. If you are planning to do this on your own, then note that there should be no errors during the repairs. You may be glad to know that repairing wood siding is an easy do it yourself project and cheap as well. But proper method and patience is the key to win here.
Tools and Equipment
Let’s start a discussion about the process by the siding repair tools and material you need for the job. This will include a hammer, electric miter saw, pry bar, multi-tool fitted with a wood blade, carpenter’s pencil, speed square, dusk mask tape measure, utility knife and several replacement blades, stainless steel siding nails (1 3/4 -inch long), primer and exterior paint, and exterior grade caulking.
Single Wood Siding Board Repairing

The damaged wood siding will be firmly placed. All the wood clapboard siding will be painted multiple times with the paint. Furthermore, the caulking might have been injected into seams at any of the four edges.
There will be nails pierced at the top and bottom adjacent boards and boards will be damaged as well. Note that these connections will make your DIY siding repair job complex because you don’t have to disturb the surrounding boards while working. Once you have removed the board, then you will cut the new one and will place them.
Spot Your Repair Area
In some situations, you might have to remove the entire length of the siding board. But note that this may be unnecessary because you can only remove the damaged portions instead of removing all the siding boards.
You should mark the section that extends about a foot to the damaged area. Just place your Speed Square against the bottom of the siding board that is damaged and you should draw a vertical line using the carpenter’s pencil. You have to do this on both sides of the damaged area.
Remove Caulking and Paint
For this, you have to take your utility knife and slice away the paint along with the caulking that is connecting the damaged board to other boards. Just push the knife all the way for ensuring that the connection is broken. You might need multiple cuts and you have to change blades frequently. You should extend your cuts a few inches more to your pencil marks.
Go with Vertical Cuts
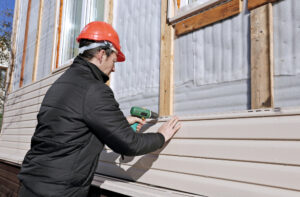
To make the plunge cuts, an electric multi-tool is the right choice for this job. For your information, the multi-tools are very versatile and used by expert wood siding repair contractors during the home improvements. It will be best to purchase one. You have to fix the wood blade on a multi-tool. Turn on the multi-tool and cut on vertical lines but before you do this, wear safety glasses and a dust mask. You need to be careful with your cuts, you should stop instantly after completely cutting through the board.
Removal of Nails
To remove the nail, you have to force the pry bar in gaps between the damaged board and adjacent good boards. You have to gently rock pry bar back and forth. This will bring out the nails and you can easily pull them out without using the claw section of your hammer. After this, remove the damaged section of your siding.
Cutting New Siding
Now you should use damaged siding as a template to get the dimension for a new siding board. To cut the new boards, you should use the electric miter saw. You might not be an expert in this task, so to avoid any problems you may hire an expert for Cape Cod house siding service without any hesitation.
Placing the Replacement Siding Board
Just slide the replacement board upward, underneath its top neighbor. You need to ensure that the board is lying flat against the side of the house. Now, nail the replacement siding board in place by driving nails via existing holes in the top board. Remember that this will not hold it for a longer time, so you have to add additional nails on the top board. You should stay along the bottom half-inch edge of the top board so that you can be sure of piercing the replacement siding board.
Next, you have to nail the bottom of the replacement board. Be sure to stay on the bottom half-inch to ensure that the nails pierce through the adjacent bottom board.
Caulking and Painting Siding

You have to caulk all the horizontal seams between the boards. Furthermore, you have to inject caulk for vertical seams and then force caulk to move it further by rubbing it with your fingers.
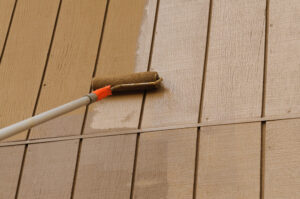
Once the caulk is fully cured, then you have to prime the board. After this apply a fresh coat of exterior paint of your own choice. As it is a new board, so it is recommended to apply two coats of paint.
Hope now you are aware of the easy steps of wood siding repair. In some conditions, all individuals may not be able to perform this entire process. Those individuals should get a siding installation service from a professional company like Corey and Corey. The expert workers will do the job using the right techniques and tools.
What are you waiting for? You can call 508-775-8240 to get an expert on your siding repair.


